

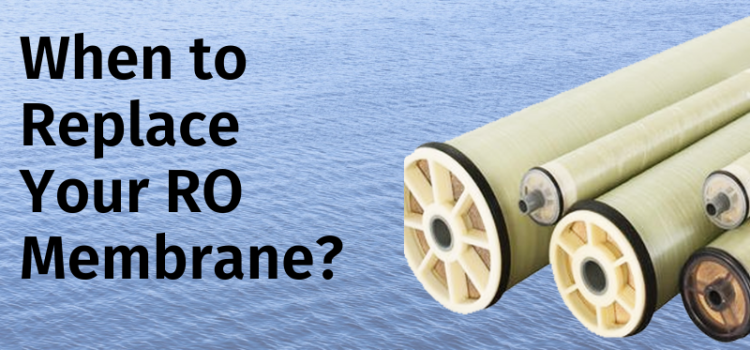

The RO membrane is the functional heart of any reverse osmosis system. Pre-filters can be replaced cheaply every few months, but the membrane is the component that determines whether your system is actually removing contaminants — or just passing water through a degraded surface and calling it filtered.
Membranes don’t fail suddenly. They degrade gradually, and many systems never alert you when performance has dropped below acceptable levels. Understanding when to replace your RO membrane — and what happens if you don’t — is practical, not just theoretical.
How Long Does a Reverse Osmosis Membrane Last?
A residential RO membrane typically lasts 2–5 years. Industrial membranes can run 5–7 years with excellent pre-treatment. The wide range isn’t vague advice — it reflects genuine variability based on:
- Feed water TDS: High-dissolved-solids water works the membrane harder. A membrane rated for “2–5 years” will hit the lower end on 400+ ppm feed water, the higher end on 100–150 ppm municipal water.
- Chlorine exposure: If your carbon pre-filter isn’t changed on schedule and chlorine breaks through, it rapidly degrades the polyamide membrane surface. A single carbon filter failure can destroy a membrane within weeks.
- Sediment load: High-turbidity water clogs membrane surfaces. Adequate pre-filtration extends membrane life significantly.
- System run time: A system that produces 2 gallons per day for a single person degrades more slowly than one producing 10+ gallons daily for a large household.
- Scaling chemistry: Hard water without antiscalant treatment causes mineral deposits that physically foul the membrane surface and permanently reduce performance.
Signs Your RO Membrane Needs Replacement
Don’t rely on taste or visual inspection alone. Degraded membranes often produce water that looks and tastes fine while allowing significantly more contaminants through than acceptable. Use these measurable indicators instead:
TDS meter test (most reliable): Measure the TDS of your feed water (from the tap before the system) and your RO permeate (from the RO faucet). A healthy membrane should reject 90–97% of TDS.
Formula: Rejection % = 1 – (permeate TDS ÷ feed TDS) × 100
Example: Feed = 300 ppm, Permeate = 20 ppm → Rejection = 93.3% ✓
Example: Feed = 300 ppm, Permeate = 60 ppm → Rejection = 80% → Membrane degraded
When rejection drops below 85–90%, the membrane is failing and should be replaced.
Reduced water production: A significant drop in the rate your RO system fills the storage tank (without a change in water pressure) indicates membrane fouling. If your system used to fill the tank in 4 hours and now takes 8+, the membrane is compromised.
Increased reject water ratio: If you’re noticing more drain water but less product water, the membrane’s recovery efficiency is declining.
TDS meter reads high on permeate: If permeate TDS creeps up over time despite replacing pre-filters on schedule, the membrane is degrading.
How to Check Your Membrane Performance
A TDS meter costs $10–$20 and is the most useful maintenance tool for any RO owner. Test twice a year:
- Run your RO faucet for 2 minutes to flush the storage tank
- Collect a sample and measure permeate TDS
- Measure TDS from your cold tap (feed water)
- Calculate rejection percentage
Record the results. Membrane degradation is a trend, not a sudden event — watching TDS creep up over time gives you early warning before performance becomes problematic.
What Happens If You Don’t Replace the Membrane?
Continued use of a degraded membrane isn’t just inefficient — it’s counterproductive to the reason you installed the system:
- Rejection of lead, arsenic, PFAS, and nitrates falls proportionally with TDS rejection. An 80% rejection rate that was once 95% means significantly more contaminants reaching your glass.
- A fouled membrane increases operating pressure requirements, straining the system’s pump and fittings.
- Heavily fouled membranes can become a breeding site for biofilm, potentially adding bacteria to otherwise clean water.
Membrane Replacement: What It Involves
Residential RO membranes are housed in a dedicated pressure vessel (the larger of the filter housings under your sink). Replacement is a 10–15 minute DIY task for most systems:
- Shut off the feed water valve
- Depressurize by opening the RO faucet
- Unscrew the membrane housing
- Pull out the old membrane (may require a firm grip or gentle prying)
- Insert the new membrane (check orientation — typically one end is smaller and goes in first)
- Reassemble, restore water, and let the system run through one full tank cycle before using the water
Cost: Residential replacement membranes range from $25–$80 depending on capacity and brand. Name-brand NSF-certified membranes from reputable suppliers are worth the price over bargain imports with unverified rejection specs.
AMPAC USA carries genuine replacement membranes for all major RO configurations. Explore our residential RO systems and replacement parts — backed by expert support when you have questions.
Related Articles
- Reverse Osmosis Membrane Lifespan: How Long Do RO Membranes Last? [Maintenance Guide]
- The Component that every Reverse Osmosis System gets its effectiveness from; Semi-Permeable Membrane
- Reverse Osmosis System Maintenance Guide: Service Intervals and Procedures
- How Reverse Osmosis Works: The Complete Technical Guide | AMPAC USA
Frequently Asked Questions
What are the primary signs indicating an RO membrane needs replacement?
The primary indicators for RO membrane replacement are a noticeable reduction in the system’s permeate flow rate and an increase in the RO permeate conductivity. These changes suggest the membrane’s ability to effectively purify water and reject salts is diminishing, potentially leading to water scarcity or compromised water quality.
What is the expected lifespan of a commercial or industrial RO membrane?
Commercial and industrial RO membranes typically last between 3 to 10 years, though this can vary significantly. Factors such as consistent maintenance, the quality of the feed water, and the presence of strong oxidants directly influence a membrane’s operational life. AMPAC USA engineers observe that well-maintained systems often achieve the longer end of this spectrum.
How does proper maintenance extend the life of an RO membrane?
Proper maintenance is the single most critical factor in extending an RO membrane’s lifespan and maintaining system efficiency. Regular cleaning, pre-treatment upkeep, and monitoring prevent fouling and scaling, which are common causes of premature membrane degradation. Neglecting maintenance can drastically shorten the life of even new membranes.
What impact do strong oxidants, like free chlorine, have on RO membranes?
Strong oxidants, particularly free chlorine, can severely damage RO membranes by degrading their polyamide material. Constant exposure or high concentrations lead to a significant reduction in RO salt rejection and an increase in permeate flow rate, indicating irreversible membrane damage. Effective pre-treatment to remove oxidants is crucial for membrane protection.
How do I know if my RO membrane is performing optimally?
An optimally performing RO membrane will consistently exhibit decent permeate flow rates and high salt rejection levels. Monitoring these two key performance indicators allows operators to track membrane health. A decline in salt rejection or a drop in permeate flow signals that the membrane is aging or experiencing issues, necessitating further investigation or replacement.
How often should I replace my reverse osmosis membrane?
Most homeowners find they need to replace their RO membrane every 2 to 5 years, though how often to replace a reverse osmosis membrane really depends on your water quality and usage. Pre-filters — sediment filters and carbon filters — extend membrane life by removing larger particles and chlorine before water reaches the membrane, so it’s worth checking those on the same schedule.
How do I know when to replace a reverse osmosis membrane, and how long do RO membranes typically last?
The most reliable way to know when to replace a reverse osmosis membrane is water testing: if a water softener or TDS meter shows rising dissolved solids, or if a polishing filter downstream can’t keep up, the membrane has likely reached the end of its life. High quality membranes generally purify water effectively for 2 to 5 years, which is why many households simply set a reminder for how often to change their reverse osmosis membrane rather than waiting for symptoms to appear.
AMPAC USA engineers custom water purification systems for commercial, industrial, and emergency applications — from 500 GPD to multi-million GPD. Trusted by municipalities, military, and industry worldwide.