Reverse osmosis systems are reliable — but they’re also mechanical systems with membranes, valves, pumps, and pressure-sensitive components that develop specific failure modes over time. Most RO problems follow predictable patterns, and most of them have straightforward fixes that don’t require a service call. Here’s a systematic approach to troubleshooting any reverse osmosis system.
Diagnosing by Symptom
Problem: Very Slow Water Production or No Water at All
This is the most common RO complaint. Work through this checklist in order:
- Check the feed water supply valve. It must be fully open. A partially closed saddle valve is a surprisingly common cause of low flow that gets overlooked.
- Check feed water pressure. RO systems require minimum 40 PSI; optimal is 60–80 PSI. Under 40 PSI, production drops sharply. Test at the cold water supply line. If pressure is low, a booster pump is the solution.
- Check the sediment pre-filter. A clogged sediment filter restricts flow to the membrane. Replace it (should be done every 6 months regardless).
- Check the storage tank pressure. An under-pressurized tank causes apparent low production. With the tank empty, the air bladder should read 5–8 PSI via the Schrader valve (like a tire valve). If under 5 PSI, add air with a bicycle pump until it reaches 7 PSI. Never add air when the tank is full of water.
- Check the automatic shutoff valve (ASO). The ASO closes when the storage tank is full and reopens when pressure drops. If stuck closed, no water can flow. Test by depressurizing the tank and checking if production resumes.
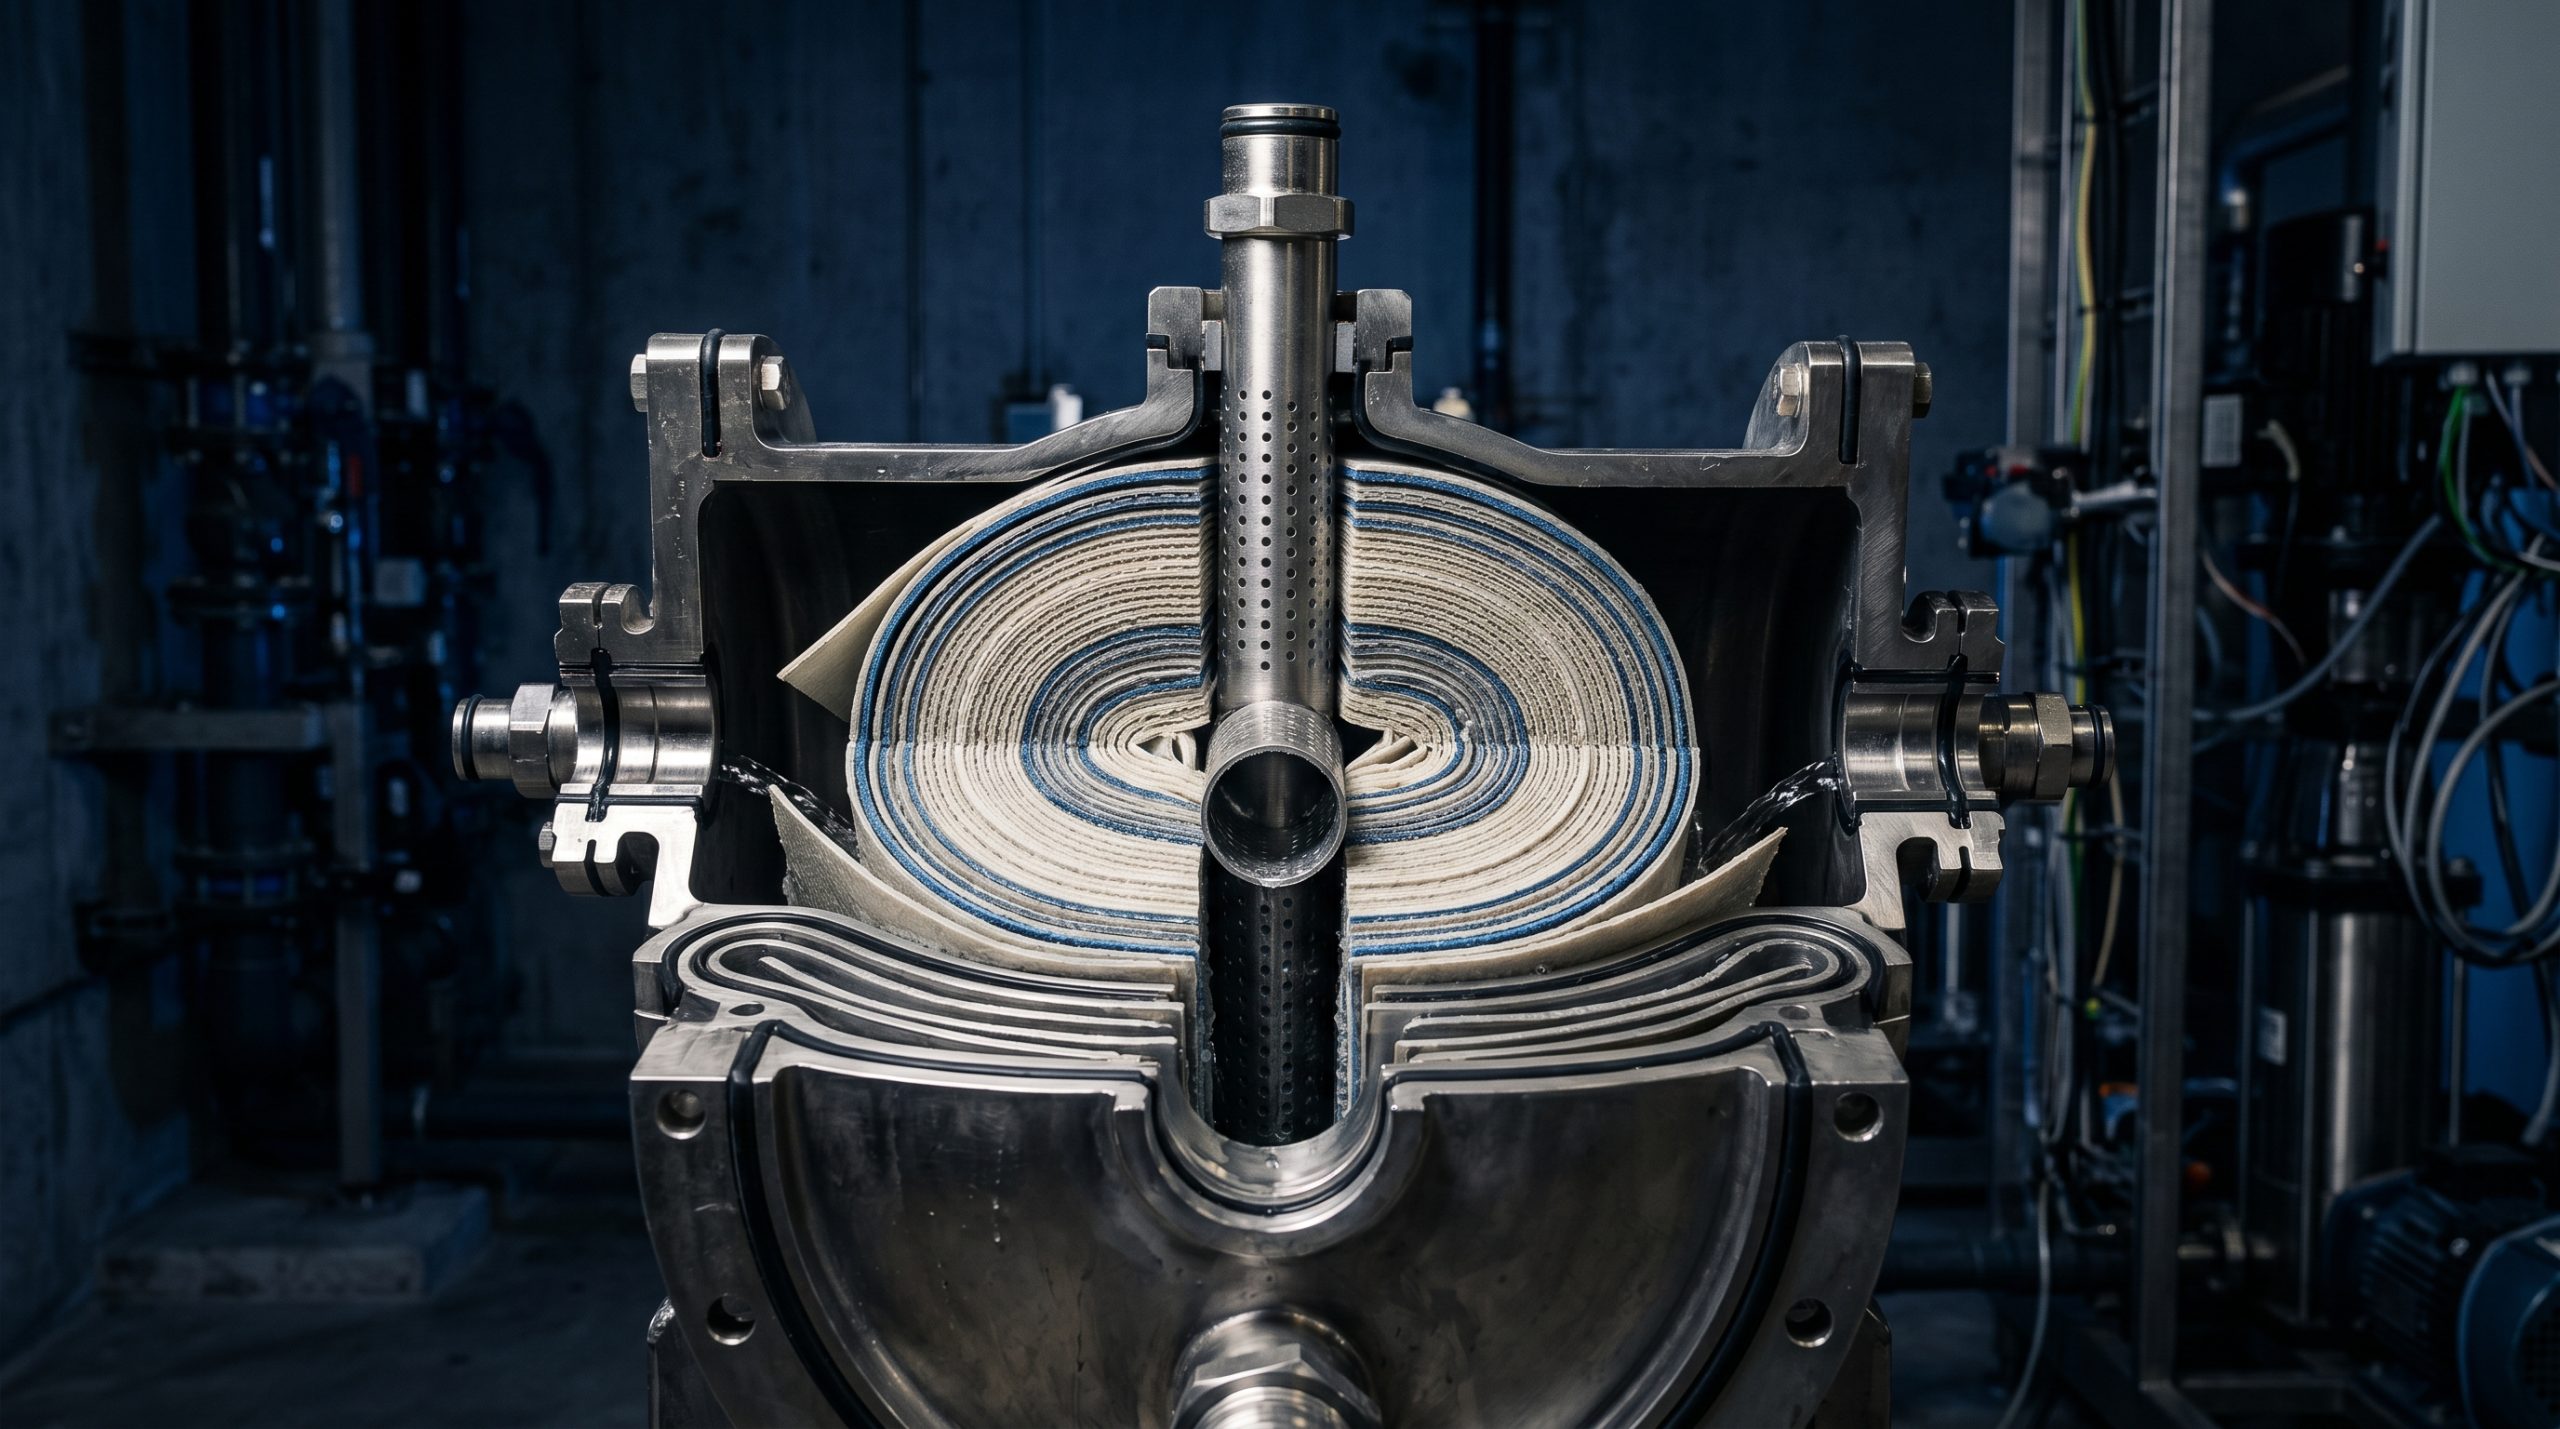
- Check the RO membrane. An old or fouled membrane has reduced permeate production rate. If everything else checks out, a membrane nearing end-of-life is the likely cause.
Problem: RO Tank Fills Too Slowly
Normal fill time for a residential RO tank is roughly 2–4 hours from empty. If it’s taking significantly longer:
- Feed water pressure below 60 PSI — most residential RO systems produce at optimal rate at 60–80 PSI
- Pre-filters due for replacement — partially clogged cartridges reduce flow to the membrane
- RO membrane aging — production rate declines as membrane fouls over time. Check TDS rejection alongside production rate to distinguish fouling from simple aging.
- Cold water temperature — RO production rate drops approximately 1–2% per °C below 25°C. A system producing 50 GPD in summer might produce 35 GPD in winter with cold groundwater.
Problem: Water Tastes Bad or Has Odor
RO water should have essentially no taste. If it has one, the cause is usually traceable:
- Chlorine or chemical taste: Carbon post-filter exhausted. Replace it. If the taste appeared suddenly after a municipal water treatment change, the pre-filter carbon may also need replacement sooner than scheduled.
- Musty or earthy taste: Biofilm growth in the storage tank or post-filter housing. Sanitize the tank (flush with dilute hydrogen peroxide solution, consult your system manual), replace post-filter.
- Flat or “empty” taste: This is simply low-TDS water — normal for RO. Many people prefer a remineralization stage added after the membrane to restore minerals and improve taste.
- Sulfur or rotten egg smell: Hydrogen sulfide present in feed water that the RO system isn’t fully removing (particularly at high concentrations). Pre-treatment with carbon or oxidation-filtration before the membrane is needed.
- New plastic taste from a new system: Run 3–4 full tank cycles and discard before consuming water from a new installation. The plastic taste dissipates.
Problem: Leak Under the Sink
Most RO leaks are at push-to-connect fittings — the quick-connect couplings that join tubing to components. A fitting that wasn’t fully seated during installation or that worked loose over time is the most common source.
How to check push-to-connect fittings:
- Dry all fittings and tubing with a cloth
- Run the system for 20 minutes
- Check each connection for moisture
- For any leaking fitting: press the release collar (the ring around the tubing entry) while pulling the tubing out firmly. Trim 1/4 inch from the tubing end with a clean square cut, then reinsert fully until it clicks or stops.
If a fitting still leaks after reseating, the fitting itself or the associated O-ring may be damaged. Replace the fitting — they’re inexpensive.
Problem: RO System Runs Continuously / Doesn’t Shut Off
A properly functioning RO system should stop producing water when the storage tank reaches about 2/3 of feed water pressure. If it’s running constantly:
- Check tank pressure. If the tank bladder has failed (no air pressure in the tank), the ASO never sees enough back pressure to close. Replace the tank if the bladder is ruptured.
- Check the automatic shutoff valve (ASO). A stuck-open ASO won’t close when the tank is full. Test by disconnecting the tube from the ASO going to the tank — if the system stops, the ASO is failing. Replace it.
- Check for leaks downstream. If water is running out of the system (from a faucet left partially open, a plumbing leak), the system will run continuously trying to fill the tank.
Problem: High TDS in Permeate / Reduced Contaminant Removal
TDS rejection below 90% indicates membrane degradation or failure:
- Gradual TDS increase over months: Normal membrane aging. Replace when rejection drops below 90%.
- Sudden TDS jump: Usually indicates chlorine breakthrough from a failed carbon pre-filter. If free chlorine reached the membrane, it may have caused permanent damage. Replace both the carbon pre-filter and the membrane.
- New membrane that shows high TDS: New membranes may have some glycerin preservative in the first 1–2 tank flushes — run two cycles and retest before drawing conclusions about a new membrane’s performance.
Problem: Water Has White Film or Scale on Fixtures
If your post-RO water is leaving scale, the remineralization cartridge is overdosing, or the system isn’t working correctly and hard tap water is bypassing the RO. Check that all connections are correctly routed and that the remineralization cartridge’s media hasn’t exhausted in a way that causes a chemistry shift.
Preventive Maintenance Schedule (Quick Reference)
| Component | Interval | Cost (Residential) |
|---|---|---|
| Sediment pre-filter | 6–12 months | $10–$25 |
| Carbon pre-filter(s) | 6–12 months | $15–$30 |
| Post-carbon filter | 6–12 months | $15–$25 |
| Remineralization cartridge | 6–12 months | $20–$40 |
| RO membrane | 2–5 years | $30–$80 |
| Tank pressure check | Annually | Free |
| TDS testing | Quarterly | $15 for TDS meter (one-time) |
If your system is giving you persistent trouble that these steps don’t resolve, AMPAC USA’s technical support team can diagnose most issues by phone or email — or explore our replacement parts and system upgrades for systems approaching end-of-life.
Related Articles
- Reverse Osmosis System Maintenance Guide: Service Intervals and Procedures
- How Reverse Osmosis Works: The Complete Technical Guide | AMPAC USA
- Water Softener vs Reverse Osmosis: Which Do You Need? | AMPAC USA
- What Is Reverse Osmosis? The Complete 2026 Guide to RO Water Purification
Frequently Asked Questions
How often should an RO membrane be replaced?
For optimal performance, an RO membrane should typically be replaced annually. If your system experiences low water pressure or reduced water quality, and the membrane hasn’t been changed in a year, it’s a strong indicator for replacement. AMPAC USA engineers recommend regular membrane checks to prevent fouling and maintain system efficiency.
What is the recommended water pressure for an RO system?
An RO system operates optimally when the facility’s water pressure is maintained between 40-60 psi. If your pressure falls below this range, a booster pump may be necessary to ensure efficient filtration and prevent issues like low flow or premature membrane fouling. AMPAC USA systems are designed to perform reliably within these parameters.
What are the common causes of low water pressure in a reverse osmosis system?
Low water pressure in an RO system often stems from a clogged or fouled RO membrane, a ruptured air bladder in the storage tank, or obstructed pre-filters like carbon block and sediment filters. Kinks in the water line or insufficient feed pressure from your facility (below 40 psi) can also significantly reduce flow. Addressing these issues promptly is crucial for system efficiency.
How do I troubleshoot a ruptured air bladder in my RO storage tank?
To check for a ruptured air bladder, attempt to charge the RO storage tank with an air compressor. If the tank cannot maintain six psi air pressure, it indicates a ruptured bladder. In such cases, the entire storage tank needs to be replaced to restore proper system function and water flow.
What is the first step to flush a potentially clogged RO membrane?
To perform an initial flush of a potentially clogged RO membrane, first remove the drain flow restrictor. Allow water to flow freely for approximately 10 minutes. This process helps to clear minor obstructions and can improve water flow and pressure, a technique often employed by AMPAC USA field engineers.
AMPAC USA engineers custom water purification systems for commercial, industrial, and emergency applications — from 500 GPD to multi-million GPD. Trusted by municipalities, military, and industry worldwide.