

Ensuring access to clean and safe drinking water is essential for health and well-being. Reverse Osmosis (RO) water treatment plants offer an effective solution to remove impurities and contaminants, providing high-quality water for consumption. This comprehensive guide provides a step-by-step approach to installing an RO system, incorporating essential components and best practices to ensure optimal performance.
What is Reverse Osmosis Systems
Reverse osmosis is a highly effective water purification method that employs a semi-permeable membrane to remove ions, unwanted molecules, and larger particles from drinking water, ensuring cleaner and safer water for consumption. When pressure is applied to the water, contaminants are filtered out, and only pure water molecules are able to pass through. This method effectively reduces pollutants such as lead, fluoride, chlorine, and pesticides, resulting in high-quality drinking water.
Selecting the Appropriate RO System
Before installation, it’s crucial to choose an RO system that aligns with your specific needs. Consider factors such as:
- Water Quality: Conduct a water analysis to identify contaminants present in your water supply.
- System Capacity: Ensure the system can handle your household’s daily water consumption.
- Space Availability: Verify that there is sufficient space under the sink or the designated installation area for the system components.
- Certification: Opt for systems certified by reputable organizations to guarantee performance and safety standards.
Gathering Necessary Tools and Materials
For a successful installation, assemble the following tools and materials:
- Adjustable wrench
- Phillips head screwdriver
- Drill with appropriate drill bits (¼”, ½”, and 1¼”)
- Teflon tape
- Tubing cutter
- Quick connect fittings
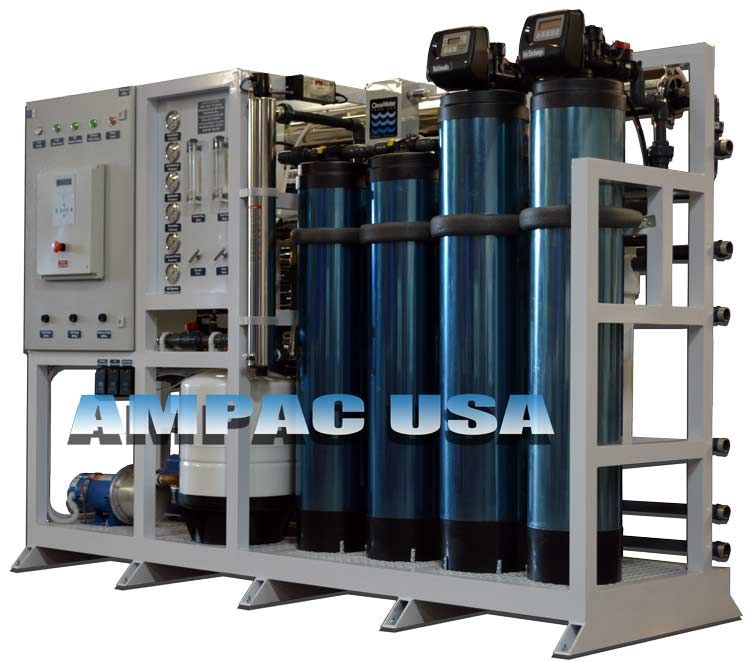
- RO system components (filters, membrane, storage tank, faucet)
- Mounting brackets and screws
Read More: How to Effectively Remove Heavy Metals from Drinking Water
Installation Process
Preparing the Installation Site
- Shut Off the Cold Water Supply: Locate the cold water valve under the sink and turn it off to stop the water flow.
- Relieve Pressure: Open the faucet to discharge any residual water pressure in the lines.
- Clear the Area: Remove any items under the sink to provide ample workspace.
Installing the Feed Water Adapter
- Disconnect the Cold Water Line: Use an adjustable wrench to disconnect the cold water line from the shut-off valve.
- Attach the Feed Water Adapter: Apply Teflon tape to the threads of the shut-off valve and connect the feed water adapter. Ensure it’s securely tightened.
- Reconnect the Cold Water Line: Attach the previously disconnected cold water line to the feed water adapter’s outlet.
Mounting the RO Faucet
- Choose a Location: Select a suitable spot on the sink or countertop for the RO faucet, ensuring it’s easily accessible and doesn’t interfere with existing fixtures.
- Drill the Hole: Using a ¼” drill bit, create a pilot hole at the chosen location. Expand the hole using a ½” or 1¼” drill bit, depending on the faucet’s stem size.
- Install the Faucet: Insert the faucet stem through the hole, securing it with the provided washers and nuts from underneath the sink. Ensure the faucet is firmly mounted and properly aligned.
Connecting the Drain Line
- Position the Drain Saddle: Identify a spot on the vertical section of the sink’s drainpipe, ideally above the garbage disposal if present.
- Drill the Hole: Create a ¼” hole in the drainpipe at the marked location.
- Attach the Drain Saddle: Align the saddle over the drilled hole and secure it tightly using the provided bolts. Ensure the fitting is snug to prevent leaks.
- Connect the Tubing: Attach the RO system’s drain tubing to the drain saddle, ensuring a secure fit to handle the water flows during operation.
Installing the RO Unit and Storage Tank
- Mount the RO Unit: Position the RO unit on the cabinet wall under the sink using the provided mounting brackets. Ensure there’s enough space for filter changes and maintenance.
- Place the Storage Tank: Situate the storage tank in an upright position under the sink or in a nearby location. Ensure it’s accessible and stable.
Connecting the Tubing
- Feed Water Line: Connect tubing from the feed water adapter to the RO unit’s inlet, using quick connect fittings for a secure connection.
- Tank Line: Attach tubing from the RO unit’s outlet to the storage tank’s inlet valve.
- Faucet Line: Connect tubing from the RO unit to the RO faucet, ensuring all connections are tight to prevent leaks.
Installing the RO Membrane and Filters
- Open Filter Housings: Unscrew the RO filter housings on the RO unit.
- Insert Filters: Place the pre-filters (sediment and carbon filters) into their respective housings.
- Install the RO Membrane: Open the membrane housing, insert the RO membrane, and securely close the housing.
- Reattach Housings: Screw the filter housings back onto the RO unit, ensuring they’re tightly sealed.
Read: What is TDS Level in Water & Why Should You Measure It?
System Testing and Maintenance
Initial System Flush
- Turn On the Water Supply: Slowly open the cold water shut-off valve to allow water into the system.
- Check for Leaks: Inspect all connections and fittings for any signs of leakage. Tighten connections as necessary.
- Flush the System: Open the RO faucet and let the system run for several minutes to flush out any contaminants and air pockets.
Regular Maintenance
- Filter Replacement: Replace pre-filters every 6-12 months and the RO membrane every 2-3 years, or follow the manufacturer’s recommendations for optimal performance.
- Sanitization: Regularly clean and sanitize the system to prevent bacterial growth and ensure optimal hygiene.
- System Checks: Regularly inspect the system for leaks, unusual noises, or decreased water flow, addressing issues promptly.
Additional Considerations
- Air Gap Faucets: Some installations may require an air gap faucet to prevent backflow contamination. Refer to local plumbing codes to determine if this step is necessary.
- Professional Assistance: If you’re uncertain about any step or encounter difficulties, consider consulting a professional plumber to ensure proper installation.
By meticulously following this guide, you can successfully install a reverse osmosis water treatment plant, providing your household with high-quality, purified drinking water. Regular maintenance and adherence to manufacturer guidelines will ensure the system operates efficiently for years to come.
Frequently Asked Questions
What contaminants do reverse osmosis systems effectively remove?
Reverse osmosis systems are highly effective at removing a wide range of dissolved solids and microscopic contaminants from water. This includes pollutants such as lead, fluoride, chlorine, pesticides, and other unwanted molecules, ensuring significantly cleaner and safer water for consumption.
How do I choose the right RO system capacity for my facility?
Selecting the appropriate RO system capacity for your facility requires a thorough water analysis to identify contaminants and an assessment of your daily water consumption needs. AMPAC USA engineers recommend ensuring the system’s capacity can comfortably meet peak demand, considering future expansion, and verifying space availability for optimal performance.
What essential tools are required for installing an RO water treatment plant?
For a successful RO water treatment plant installation, you will need an adjustable wrench, Phillips head screwdriver, a drill with ¼”, ½”, and 1¼” bits, Teflon tape, and a tubing cutter. These tools are crucial for connecting components, securing fittings, and ensuring a leak-free setup.
What are the initial steps for installing an industrial RO water treatment plant?
The initial steps for installing an industrial RO water treatment plant involve preparing the site by shutting off the main cold water supply and relieving any residual system pressure. This critical preparation ensures safety and allows for the secure installation of the feed water adapter, a foundational component for the entire system.
How does a semi-permeable membrane purify water in an RO system?
A semi-permeable membrane purifies water in an RO system by acting as a selective barrier. When pressure is applied, it allows only pure water molecules to pass through, effectively filtering out larger particles, ions, and unwanted molecules like lead and chlorine, resulting in high-quality treated water.
Conclusion
Getting an RO plant installed correctly is only half the job — sticking to the maintenance schedule (pre-filters every 6-12 months, the membrane every 2-3 years) is what actually keeps it performing at spec instead of slowly losing efficiency without anyone noticing. If you’re trying to figure out whether your water needs this level of treatment in the first place, What is TDS Level in Water & Why Should You Measure It? explains what that number is telling you. Contact our team at info@ampac1.com or (909) 548-4900 if you’d like help planning or installing an RO water treatment plant.
AMPAC USA engineers custom water purification systems for commercial, industrial, and emergency applications — from 500 GPD to multi-million GPD. Trusted by municipalities, military, and industry worldwide.